
 Lightning
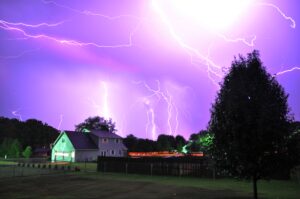
I use my Nikon D5000 to take a lot of lightning photos. This one to the right is a composite of several taken during a storm that produced a good amount of of photogenic lightning a few years back. The photos that make up this one and many of my others were created using timed exposures of up to 30 seconds on length. This is problematic, at times, due to other light sources, camera movement, etc. Using simple, arduino-based circuit, we can create a device that will attempt to detect lightning strikes and trigger a camera shutter when one is detected.
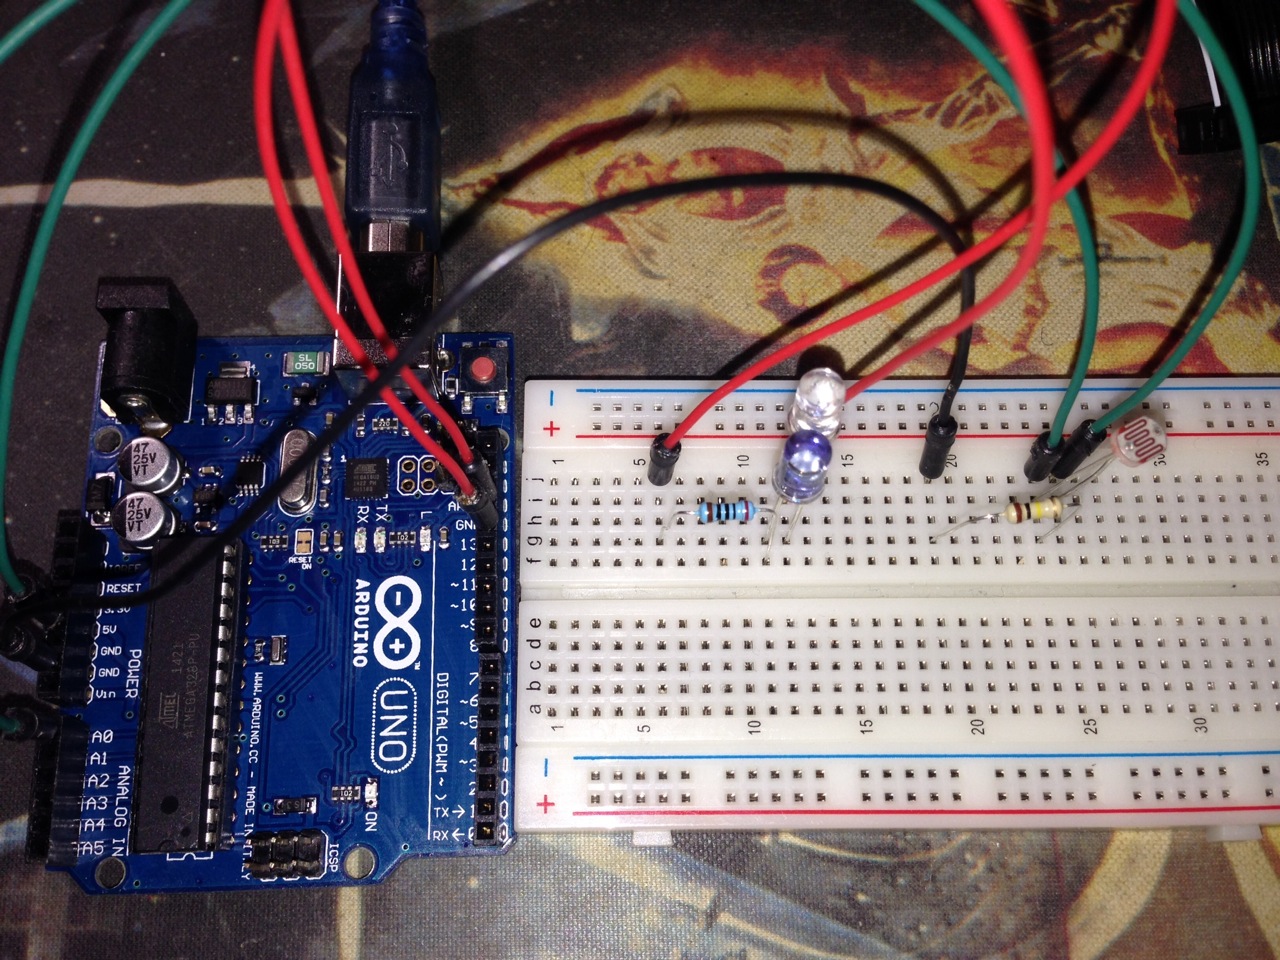
Prototyping The Circuit
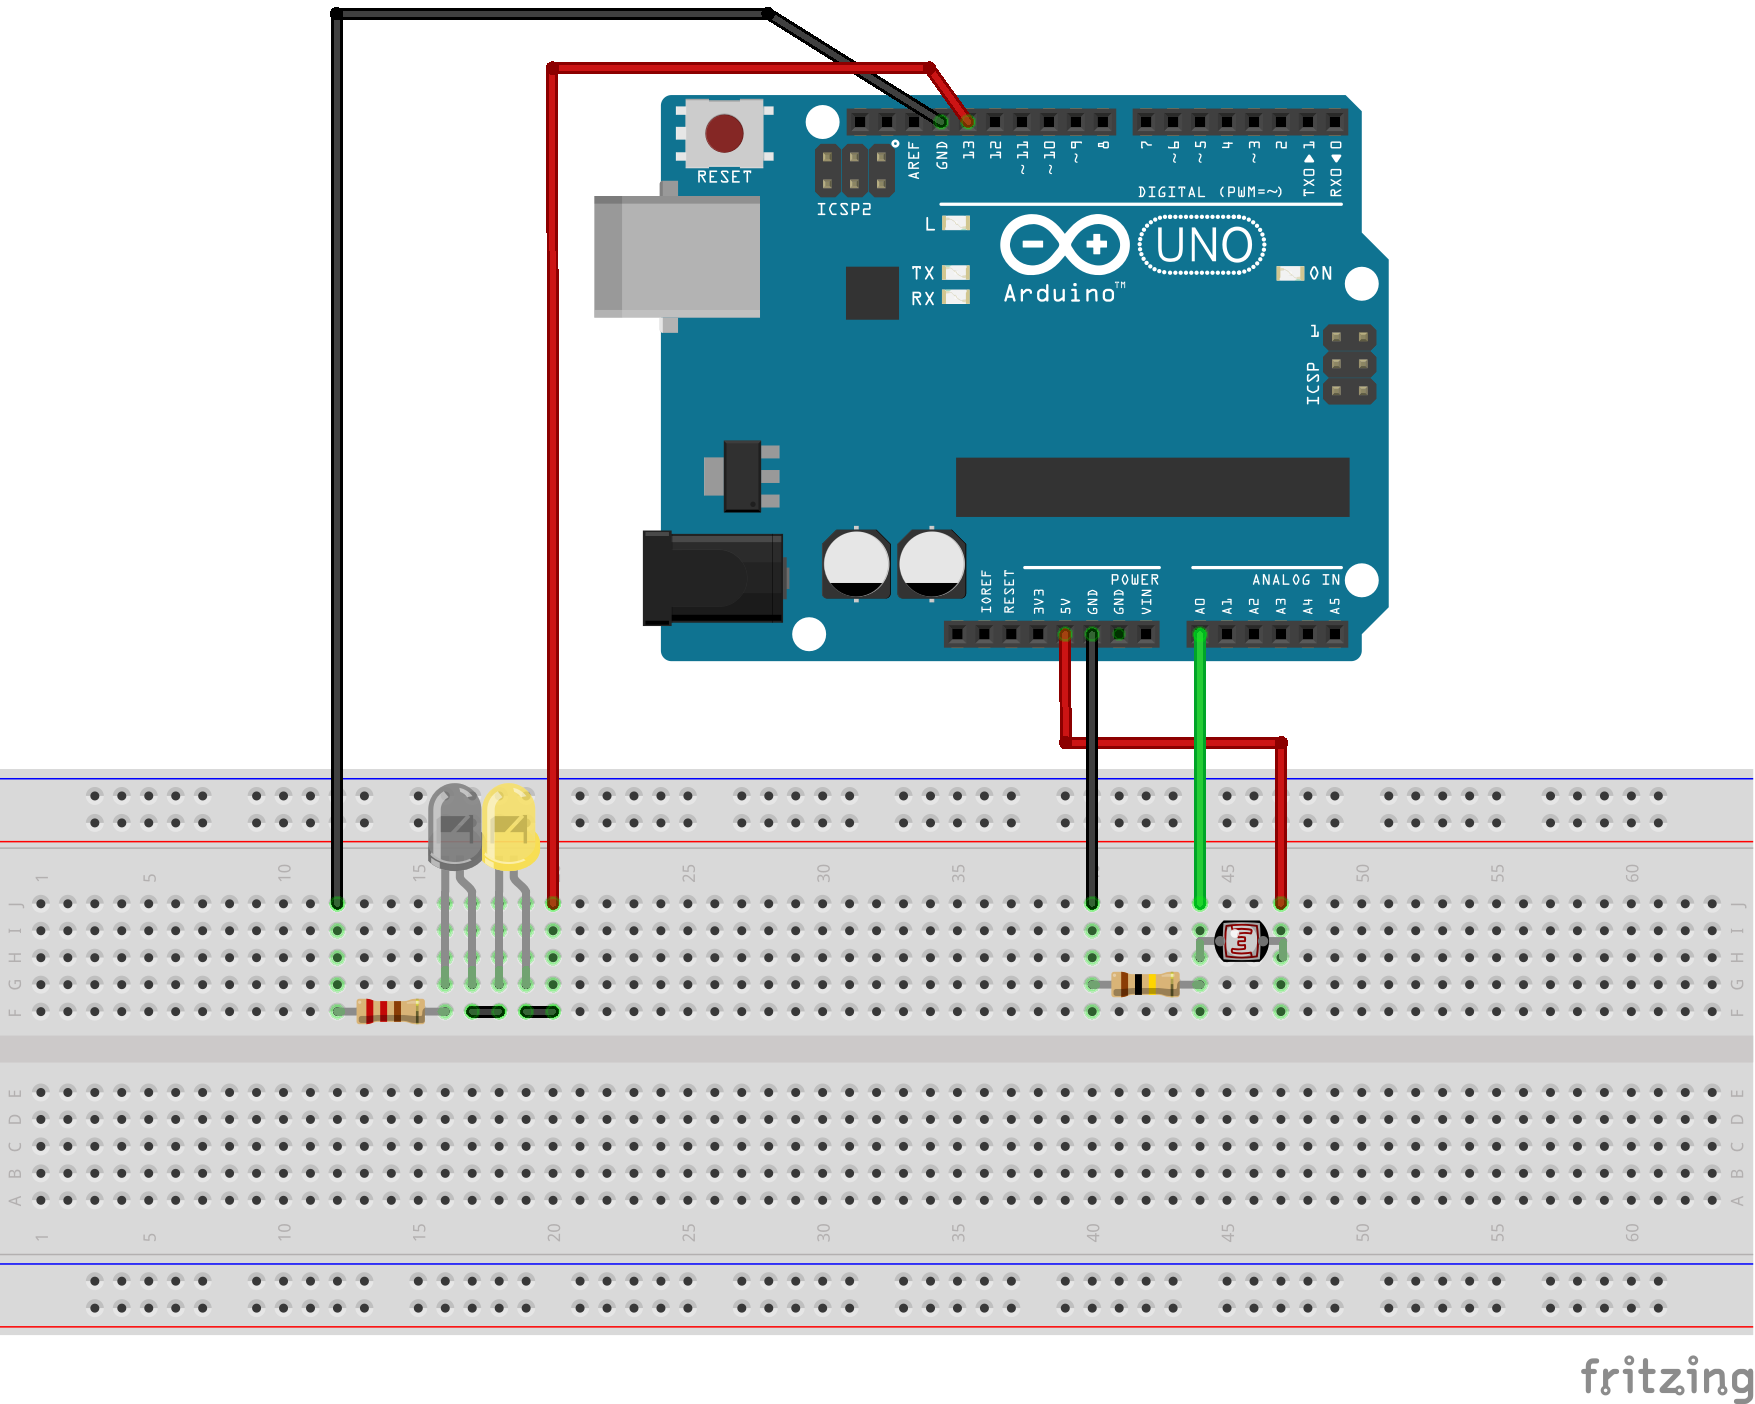
This circuit consists of 2 major pieces: lightning detection and shutter triggering. To detect lightning, a phototransistor or photoresistor is required. For this project, I used a photoresistor. To trigger the shutter, a 940nm infrared LED is required. These LEDs can be used to trigger cameras from Nikon, Canon, Pentax, Olympus, Minolta, Sony and possibly others. Below is the complete parts list I used along with links to them on Amazon.
Components:
- Arduino UNO R3 (buy)
- Photoresistor 5mm GM5539 (buy)
- 940nm Infrared LED (buy)
- Yellow LED (buy)
- 1 – 200 Ω Resistor (buy)
- 1 – 100k Ω Resistor (buy)
- Miscellaneous jumpers and breadboard (buy)
The Code
This circuit’s method of detecting lightning with a photoresistor is pretty simplistic. It simply loops infinitely recording the analog input from the photoresistor, taking the difference of it to the saved value, and comparing that to the configurable threshold. In its current configuration, it will take 2 photos per lightning strike. This is the first iteration of this code, so I may change it to use a moving average instead of just the last recorded value.
To fire the IR LED in the right sequence, I used the Multi-Camera IR Control Library since it supports my Nikon D5000. In addition to the D5000, this library supports Nikon, Canon, Pentax, Olympus, Minolta, and Sony cameras. If you don’t have a camera that is supported, a custom interface could easily be created with specifics for your camera model.
#include <multiCameraIrControl.h>
int shutterPin = 13;
int triggerPin = 0;
int threshold = 5;
int savedLightningValue = 0;
int currentLightningValue = 0;
int delayBetweenShots = 1000;
Nikon D5000(shutterPin);
void setup() {
  Serial.begin(9600);
  pinMode(shutterPin, OUTPUT);
  digitalWrite(shutterPin, LOW);
  savedLightningValue = currentLightningValue = analogRead(triggerPin);
}
void loop() {
  currentLightningValue = analogRead(triggerPin);
  Serial.println(savedLightningValue, DEC);
  if(abs(currentLightningValue - savedLightningValue) > threshold) {
    Serial.println("Triggering shutter");
    D5000.shutterNow();
    delay(delayBetweenShots);
  }
  savedLightningValue = currentLightningValue;
}
To The Field
Since the protoype is fully functional, I plan on fielding it during the next thunderstom. I will report back once I see how it works along with any refinements.
Resources
As always, I have placed the code and diagrams for this project in a github repository. It includes code that can be compiled and uploaded via the Arduino IDE and diagrams that can be viewed or edited with Fritzing.
Arduino-based DSLR Lightning Trigger http://t.co/MHDkee82M1
Pingback: DSLR Lightning Trigger 2 | Chad Dotson
Pingback: DSLR Lightning Trigger 3 | Chad Dotson
Everything else I’ve read suggests a photoresistor is too slow for this purpose. Most circuits suggest using a phototransistor for faster response.
I read the same. I did however catch lightning with this build.
Also a nerd into photography. Do you have a link to the lightning shot? curious to see how it came out?
Only ever used it once. I need to break it back out and use it again. Have a good place to use it again. It did work however. Only shot it captured wasn’t the best lightning
a few years I am working on a similar project, today I will build yours with some modifications, I will put a photocoupler to communicate with the camera, I will also use an IR sensor to filter the visible light.
Att
Raphael Sampaio
Lapa, Paraná, Brasil